Visar inlägg med etikett Tutorial. Visa alla inlägg

tisdag 24 maj 2016

TUTORIAL: Bases


Was asked by a friend to make a tutorial on how I do my bases.
Also a great way to keep it stored in case I forget...

1: Add rocks, debris and stuff to your desire...

2: Cover the base with texture paint. Colour don't really matter.

3: While the Texture paint is still wet, apply Agrellan Earth in patches. Martian Ironearth works as well.

4: Give it a lot of time to dry, it'll crack up nicely.

5: Add more texture by applying Typhus corrosion. This stage is optional.

6: Spray Chaos Black.

7: Basecoat Dryad Bark.

8: Drybrush Gorthor Brown.
9: Drybrush Zandri Dust (or Steel Legion Drab) in patches.

10: Overbrush the rocks with Skavenblight Dinge.

11: Drybrush the rocks with Dawnstone.

12: And finally, drybrush the rocks with Administratum grey.

There we go! A lot of steps, but it's worth putting some extra work into the bases as they can make a big difference on the figure looking finished. Didn't have time to make the metal part on the base, but it would have been painted Leadbelcher, Agrax Earthshade with Nuln Oil in patches, with a Necron compound/Runefang steel drybrush.


Although I want to keep this blog stricktly 40k, I am doing a lot of work on Warhammer Quest: Silver Tower at the moment! Will try to keep myself active here as well!

Cheers!

torsdag 10 april 2014

Terrain - Changing my mind and going through with the decision!

Last time I played against Øivind at my place, I realized that I wasn't satisfied with the choise I'd made for the colour scheme. I decided to re-paint my recently finished table.

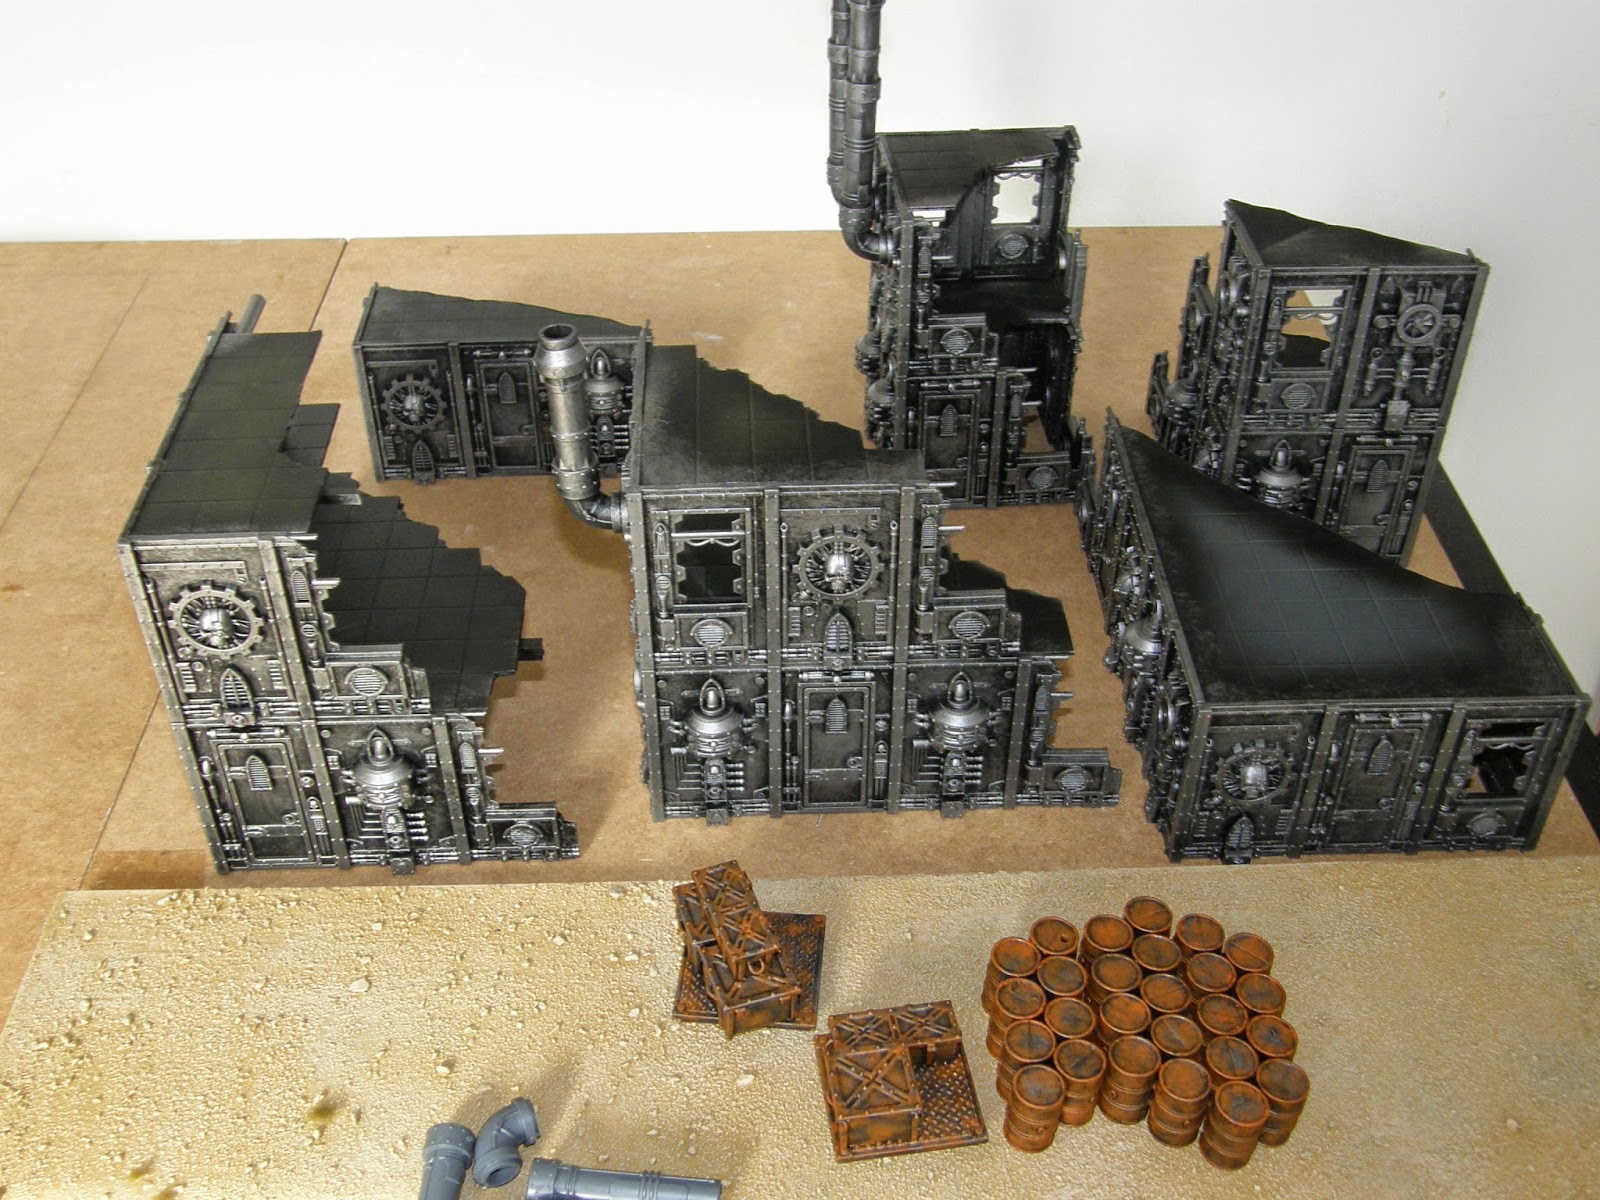
For you who have played Inquisitor (the 54mm figure-role playing game), you might remember some of the terrain they made for the rulebook. They created a world called Zarona, and designed a small frontier town in the dessert, with all kind of machinery, suggesting it used to be a mining town or similar. I wanted to do something similar. I was good and took a lot of pictures while I was painting, so I will walk you through the process.

Step 1 - Getting rid of the ugly brown I previously used. I loaded my spraygun with Zamesi dessert and covered the entire board.


I noticed that there were several patches where the sand hadn't stuck to the board (a problem you might encounter when you mix too much water with the PVA glue). This was going to be repaired.


Step 2 - I filled the patches (and some random areas that were missing sand) with a thick layer of Agrellan Earth.


When the paint dried, it cracked up and gave me the desired effect.


Step 3 - I sprayed the table again. To give a even layer of Zamesi, and to paint the patches of Agrellan Earth.


Step 4 - I drybrushed the entire table with Ushabti Bone, using a large drybrush.


I switched to an even larger brush when I realized that it would take forever to finish the board with the large drybrush.


Step 5 - Almost done! The patches that still looked "naked", i.e. missing either sand or Agrellan Earth, was decorated with a couple of Mordheim Tufts (using PVA glue).


Step 6 - And onto the buildings! I donated a couple of my old buildings, because I decided to use Manufactorums exclusively. These were sprayed black to begin with.


 Step 7 - Using the same huge brush I used for the board, I drybrushed all the buildings Leadbelcher.


Step 8 - Using a large drybrush, I washed the buildings Agrax Earthshade...


Step 9 - ...and using the same brush, stippling Ryza Rust in patches.


Step 10 - With the same brush (Think i was my favorite during this period), I painted a verrrry light drybrush of Runefang Steel to represent chipping.


Step 11 - The floor was painted Eshin Grey.


Step 12 - Drybrushed Dawnstone.


Step 13 - And a final highlight by drybrushing Administratum Grey.


Step 14 - I had a lot of barrels and crates from my days of playing Inquisitor, so these got the same treatment as the buildings.


And there we go! The finished gaming table! I am really satisfied with the looks of the table now, and I am actually already making 3 more buildings, and adding some more barrels. I still have 4 more tiles for my Realm of Battle, and these will be finished as well at some point. As for the roofs, they are made out of textured plastic card, painted Khorne Red, washed Agrax Earthshade, then drybrushed in Leadbelcher, Ryza Rust and Runefang Steel.


I have also improved when it comes to gaming (just luck I guess), so I'm really looking forward to another game, preferably on my new table!

Until next time!
Cheers!

söndag 15 november 2009

How to: Take good pictures of your minis.

I'm going to explain how you take good pictures of you miniatures.
This requires the following:
1. A good camera with MACRO function.
2. Space for photographing.
3. A lot of bright light.
4. A miniature to phtograph.

1: I use an Olympus sp-55ouz. I have a Nikon D60, but no Macro lens for it, and since one of those cost about as much as the actual camera, I'm sticking with Olympus for a while.

2: I use a small table that stands agains the wall and my closet. To get the real studio feel, I have taped a large paper on the closet so it falls over the table to get a smooth look instad of a rough horizon. For those that don't understand my crappy english (despite my best efforts to explain), look at the picture below.


3: Bright light is an importand factor! Unfortunatly, I don't have enough lamps, and this results in shadow being cast over the miniature. Will have to pay a visit to IKEA and get a new one with stonger bulbs.

4: Now all you need is a miniature to photograph! I use... well, all the figures I'm currently painting.

An anonymous person gave me the tips to not zoom in on your minis, but bring the camera closer the models. Thank you, anonymous!


For those with sharp eyes, can you tell what miniature's in the spotlight?
On sunday, I'll post more pictures of that figure!
It's still a WIP (Work in Progress), but hopefully I'll get it done by sunday!

torsdag 22 oktober 2009

Painting Khorne: Summary

It's time to sum up my painting guide.

Undercoat the figure Chaos Black.

Flesh: Merchrite Red, wash with Baal Red, Devlan Mud, Badab Black, drybrush with Scab Red, highlight with Scab Red + Elf Flesh mix.

Brass Armor: Dwarf Bronze, wash with Devlan Mud, highlight with Shining Gold, wash with Badab Black.

Metal: Boltgun Metal, wash with Badab Black, highlight with Mithril Silver.

Skulls and Bones: Dheneb Stone, wash with Devlan Mud, highlight with Dheneb Stone + Skull White mix.

Tounge: Necron Abyss, highlight with Necron Abyss + Elf Flesh mix.

Banner: Chaos Black, highlight with Chaos Black + Shadow Grey mix.

Leather: Chardon Granite, wash with Devlan Mud, wash with a watered out Graveyard Earth.

Base: Chardon Granite, drybrush with Codex Grey, drybrush with Fortress Grey.

Finished painting Uraka the Warfiend. Pictures will be up in the next post!